When you start working with an Amazon Web Services partner, transparency is important. On the one hand, these cloud experts need to have a good deal of information to do their best work on your AWS environment. On the other hand, you need to know you can trust these AWS engineers with your sensitive information and processes. This kind of trust and transparency is tough while you and your potential partner are negotiating the business relationship. And before a contract has been signed. That’s why it’s important to know how to grant read-only access on AWS.
Why Read-Only AWS Access Is Important
Read-only access in an AWS environment is useful for when someone needs to look into your cloud environment WITHOUT being able to change anything. This way an AWS vendor can view a potential client’s setup and existing AWS applications before signing a contract and committing to helping them with AWS environments.
In addition, often the business users who negotiate a new AWS partner relationship aren’t as well-versed in the specific needs of their own system (unlike their IT team). By granting read-only access for a potential new vendor, business users can get a better sense of what their AWS needs are and what kind of environment will work best for their business. If you want to handle technical debt (things that your system is doing/running that you aren’t aware of), providing this kind of visibility is helpful for your vendor relationship to begin with the right kind of understanding and transparency.
While AWS has extensive documentation about sharing views of an AWS environment, these descriptions can be intimidating to less technical users. What follows is a step-by-step guide for how to grant read-only access to your AWS account.
GUIDE: How to Create Read-Only Access on AWS
From the main console screen, type in IAM. And select the suggested link.

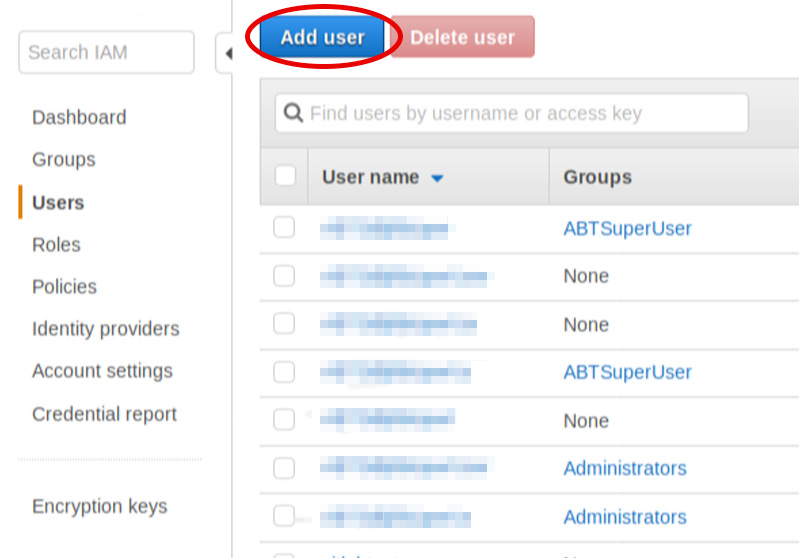
From the IAM dashboard select the Users section and then Add user button.
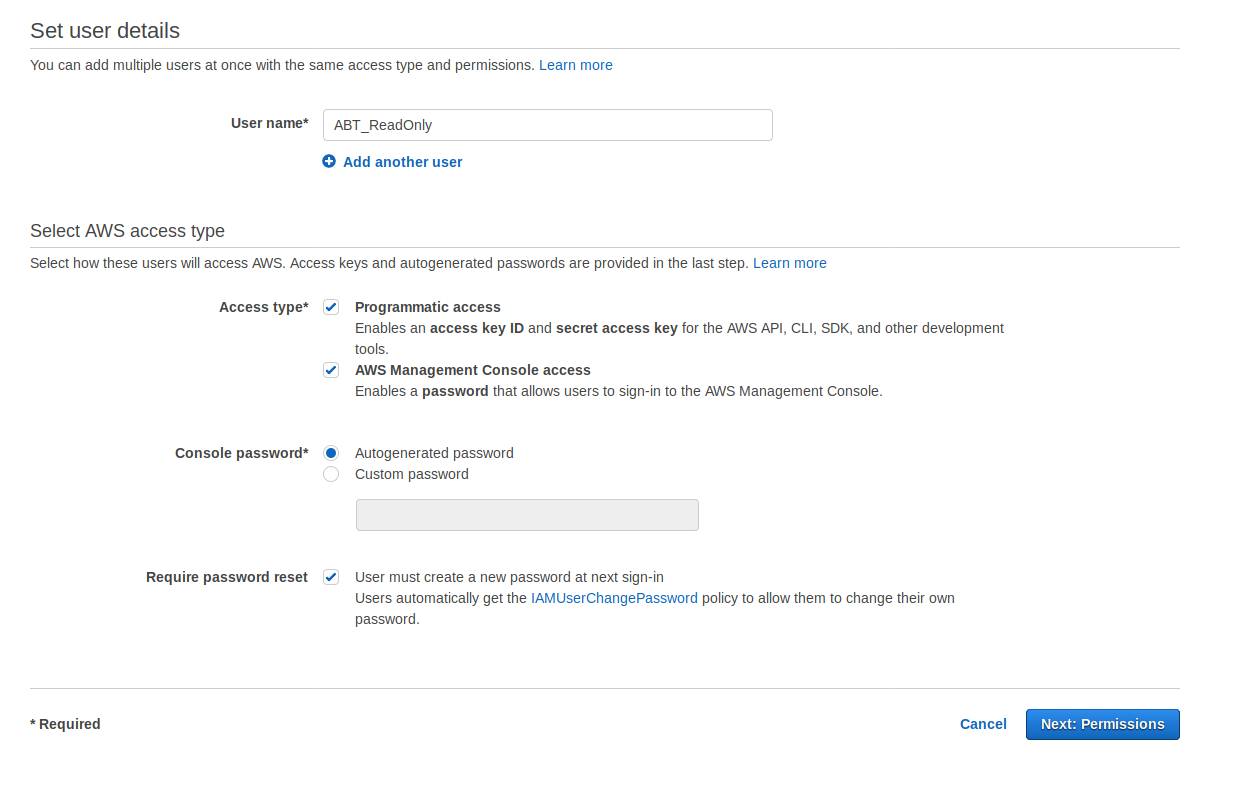
Enter the new username for your read-only user (ABT_ReadOnly in this example), select the Programmatic access and AWS Management Console Access. Then select Next: Permissions.
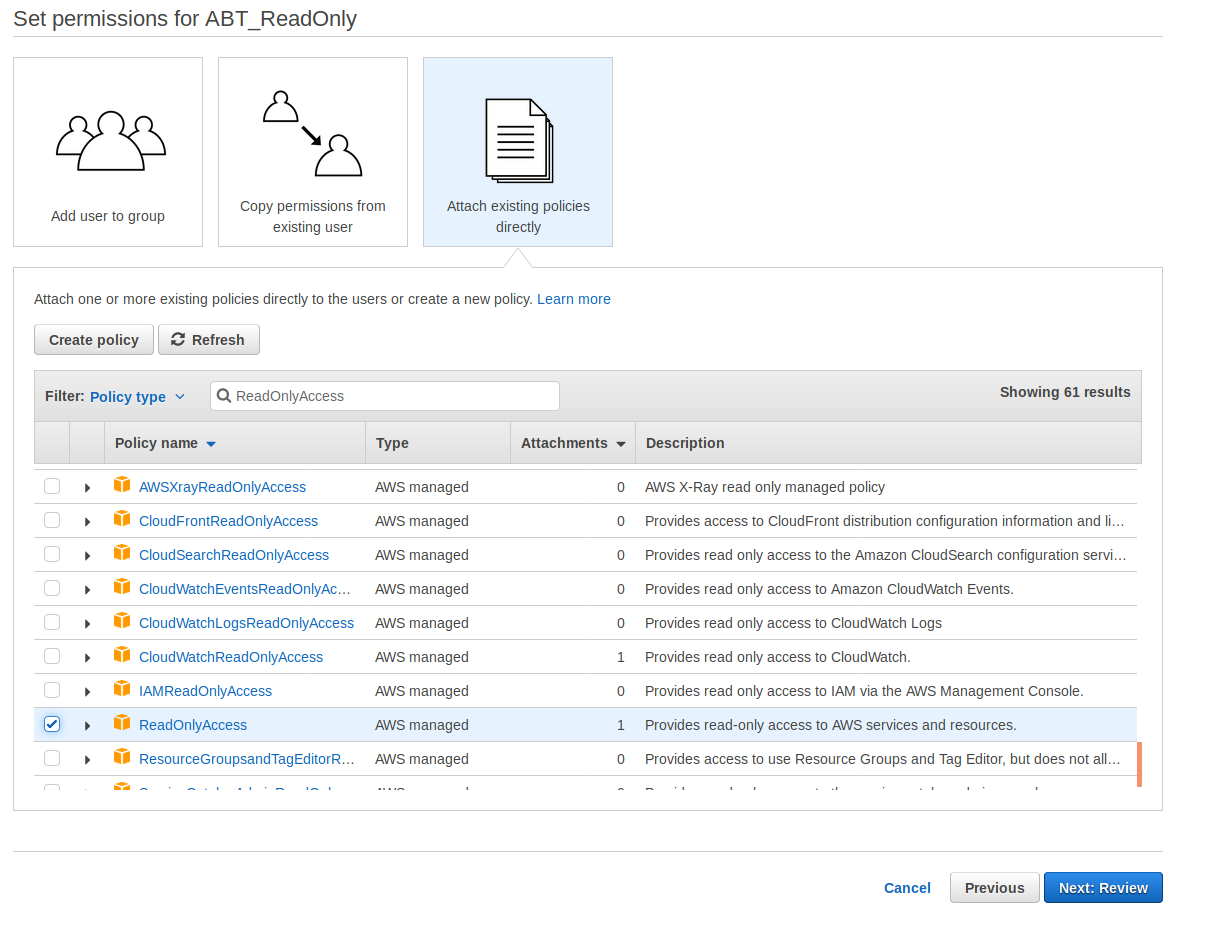
Select the Attach existing policies directly button, then use the search bar to search for ReadOnlyAccess policy. Select the check box beside that policy. Then select Next: Review.
*NOTE: it’s imperative that you select Read Only Access Policy and set the right permissions. Otherwise you’ll grant too much control to your potential new party.
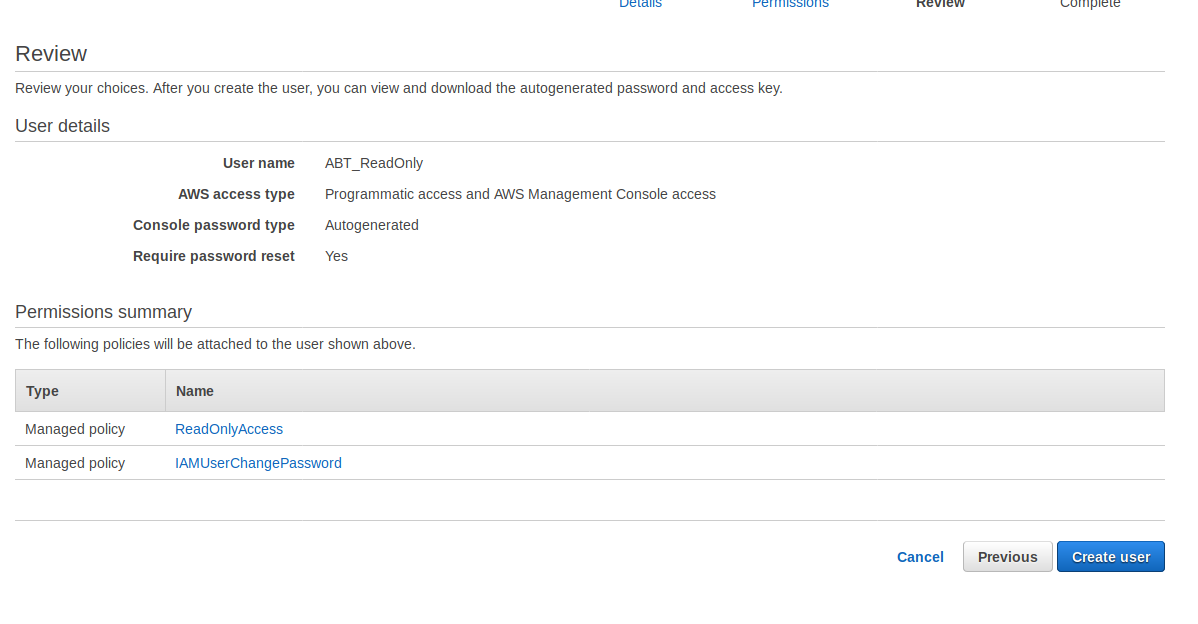
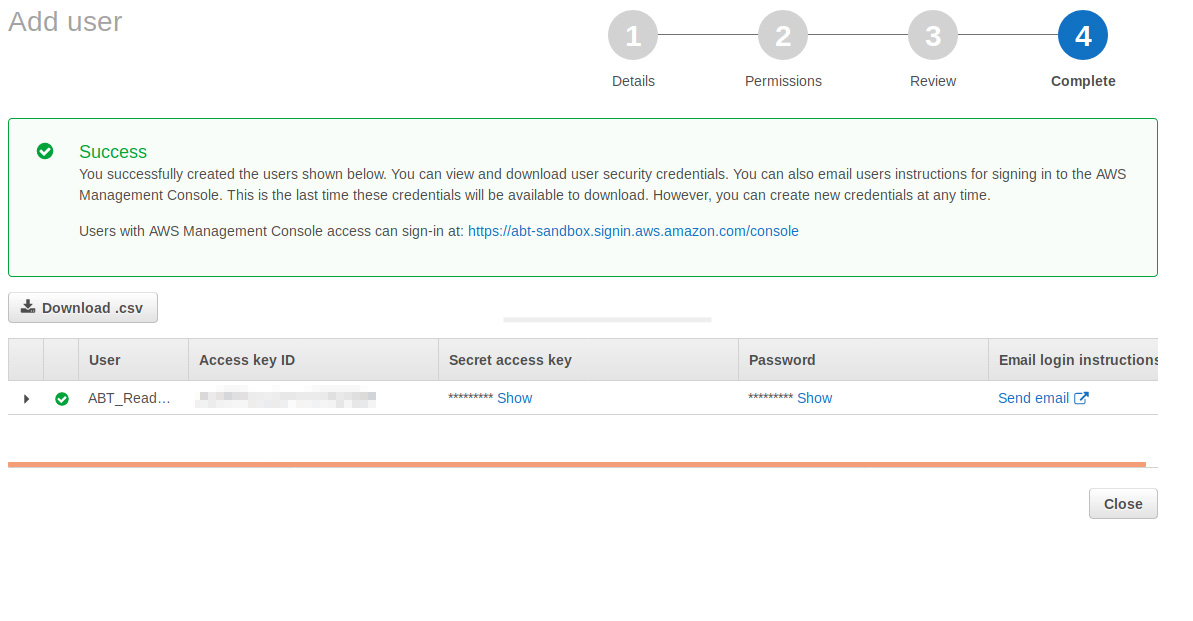
You can also download the keys with the download .csv button and provide that csv with the password to your AWS vendor. Your AWS vendor will also need the link shown in the green window where it says “Users with AWS Management Console access can sign-in at:___________ “. This link will allow your new user to sign in.
If any of these steps have you stuck, or if you’d like to ask questions about AWS user privileges, my team will be glad to help. Please reach out to us on the ABT contact form, or take a closer look at our AWS services page.


